Madison Elevator Mausoleum Puzzle Guide
Get ready for a dose of backstory. In Madison, after you cut the power in search of the red lightbulb your possessed self drew in your notebook, the front door will open. It isn’t freedom you’ll find behind it, however; it’s an elevator and mausoleum for the victims of Madison’s titular serial killer. Each floor introduces you to one of her victims, revealing the path of her killing spree. On the fifth floor is a mirror that reflects a chair and a noose. But what does it all mean? Let us help you through one of Madison’s most poorly explained puzzles, the elevator in the mausoleum puzzle.
Note: Madison features changing puzzles for different playthroughs, so the specifics of solving this puzzle may change, but the method will be the same.
Assembling the clues
To solve this puzzle, you’re going to need your hammer. If you put that in storage previously, you’re going to want to pull it out beforehand, since it’s a long walk back to the item locker.
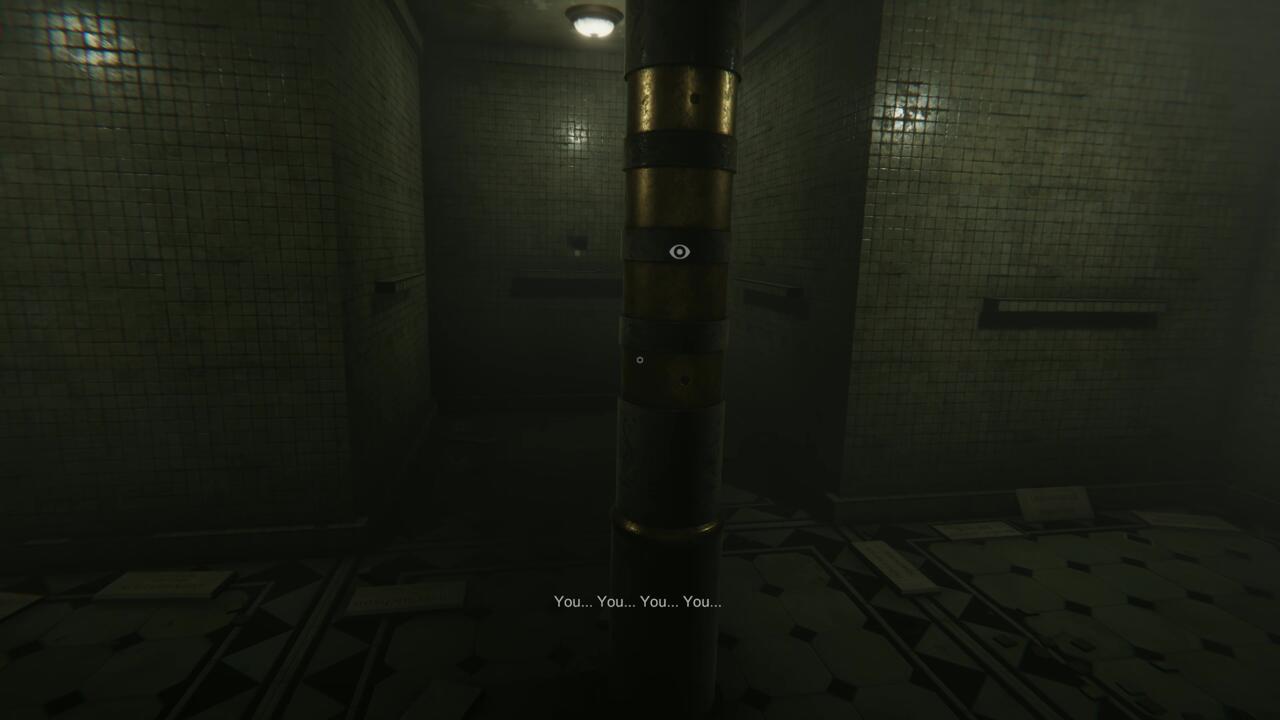
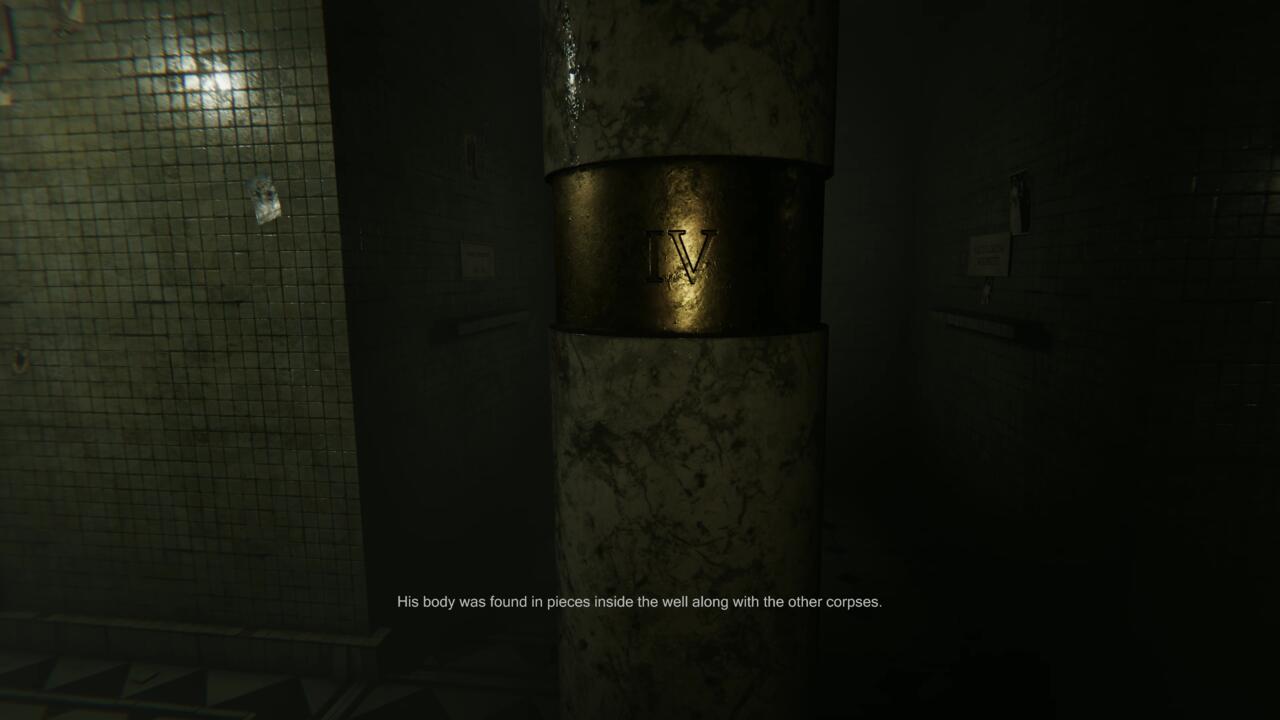
Each floor of the mausoleum is plus-shaped, with the elevator on one point, and a burial chamber on all the others. A loudspeaker will explain to you what happened to the victim on each floor. In the middle of each floor is a column with a ring of numbers on it. On the top floor is another column, but this one only has circular holes dotting its sides. The column has four rings on it and bears a resemblance to the ones beneath it.

There’s a lot of misdirection going on in this puzzle. First, the burial chambers don’t merely belong to the victims, but also to some unrelated people. If you want to find the right person, you can recognize them because they died in the year 1987. The loudspeaker also throws out some facts at you that aren’t pertinent. The victim’s ages are given, but only one is needed to confirm one of the victim’s grave sites (though, the process of elimination also works here). It also tells you how they were disfigured and how many pieces they when they were found, but this is just gruesome flavor.
Interpreting the Puzzle
You’re not going to find a lot of hints here, unfortunately. The overall goal of the puzzle is to get all the metal rings on the top floor to point their circular divot at the mirror. Mercifully, this can be accomplished by trial-and-error, but there is a method to the madness.
The ring on each of the floors below the top one can be rotated by taking a picture of one of their sides. Once again, you can return to the top floor to see if the dot is in the right place, and if it isn’t, descend again to rotate the ring until it happens to land in the right spot. However, if you want to do this without getting jump-scared by Madison a dozen times, you’re going to have to look at the order in which the victims were killed and the location of their coffins.

You need to align the roman numeral that corresponds to the sequential placing of the victim with their coffin. This means that if Lynn Jamie is buried to the right of the elevator and she’s the fourth victim, you need to point the roman numeral IV to the right of the room.
The Solution
The victims are Robert Hale, Judith Hale, Drake Fletcher, and Lynn Jamie. They go in ascending order up the floors, so Robert is on the first floor and Lynn is on the fourth.
Robert is buried to the right of the elevator, so you need to point the roman numeral I in that direction. Judith is buried on the left, so on the second floor, the roman numeral II needs to face the left side of the room. For Drake, you need to hammer a hole in the back wall to find him. You then move the roman numeral III to face him. Finally, on Lynn’s floor, she’s buried on the right of the elevator, so the number IV needs to look in that direction.
There is a simpler way to align the rings, however. If you look at the pole from the elevator, the floors are going to look like this, ascending from the bottom: II, I, I, I. Once the dots are aligned, all that is left to do is take a picture of the mirror on the top floor. Expose the photo for the next hint in the padlock puzzle, then take the key to grandpa’s workshop.
After this enigma is solved, you’ll soon be onto the clock puzzle.
GameSpot may get a commission from retail offers.
The products discussed here were independently chosen by our editors.
GameSpot may get a share of the revenue if you buy anything featured on our site.
For all the latest Gaming News Click Here
For the latest news and updates, follow us on Google News.

