How To Create A Hanging Indent On Google Docs
Everyone relies on Google Docs to write various documents, specifically scientific journals. However, some people struggle to make the program “do what you want,” such as placing hanging indents. Those are important for following your homework’s format requirements and getting a passing grade.
If you are a student or researcher, you need hanging indents for building Reference sections in research papers. They organize your sources by indicating which lines are part of a single citation. More importantly, your professor would likely reduce your grade if you do not place hanging indentations in your Google Docs assignments.
I will discuss creating hanging indents for PC and mobile phones on Google Docs. Also, I will cover the basic indentation rules for the most widely used styles, such as MLA and APA. Note that these methods may change if Google Docs launches a major update. Moreover, open Google Docs on your device for a better understanding.
How to place a hanging indent in Google Docs

Photo Credit: maschituts.com
- Start by opening Google Drive at drive.google.com.
- Open a new document or an existing one.
- Then, click on the line you want to indent.
- Click the Format menu button in the upper left corner.
- Pick the Align & Indent option.
- Next, click Indentation options.
- Open the Special indent dropdown menu, click “Hanging,” then pick a size for the indent.
- Then, click the Apply button.
You may also like: How To Digitally Sign A PDF
Alternatively, using the in-app ruler, you may put a hanging indentation in Google Docs. Here is another way you can apply that formatting rule:
- Click the View option at the top of the screen.
- Afterward, click inside the paragraph to indent.
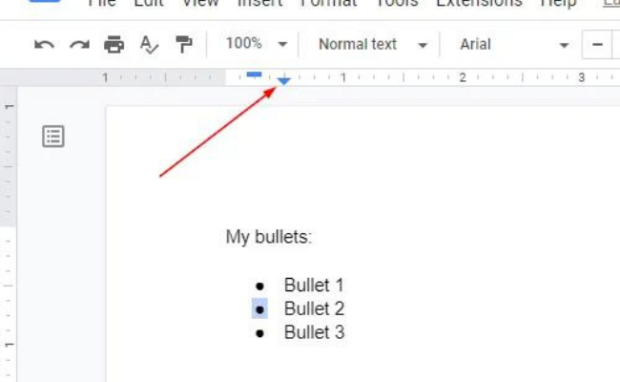
- Next, click and drag down the arrow on the ruler to where you want hanging indents. The ruler is on top of the screen.
- Drag the blue rectangle back to its original location.
Nowadays, more people use their smartphones and laptops like computers. If you’re one of those people, here’s how to place hanging indents in Google Docs mobile:
- Open the Google Docs app and select a document to edit.
- Select the pencil icon at the bottom right corner of the screen.
- Next, double-tap at the beginning of the second line in the paragraph.
- Tap the underlined “A” icon at the top of the screen.
- Then, choose the Paragraph tab.
- Select the Right Indent option.
Finally, you can indent lines in your document by dragging the arrow in the ruler to your desired size. Then, drag the rectangle to the left margin.
Other tips for placing a hanging indent in Google Docs

Photo Credit: howtogeek.com
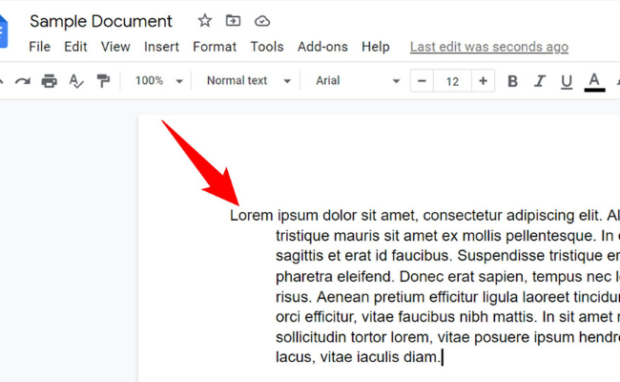
- Your ruler will show a blue rectangle and arrow when you indent lines. The rectangle is the first line indent marker, and the arrow shows where the left indent is.
- If you don’t see the ruler on your Google document, head to the View menu. Then, click the Show ruler option to enable it.
- If you need more control over the margins, head to the File menu. Next, click the Page setup option for further customization.
- You may also apply hanging indents to multiple paragraphs by clicking and dragging desired paragraphs. Then, use the indentation options or the ruler to put spaces.
What are the most common indentation rules?

Photo Credit: techswift.org
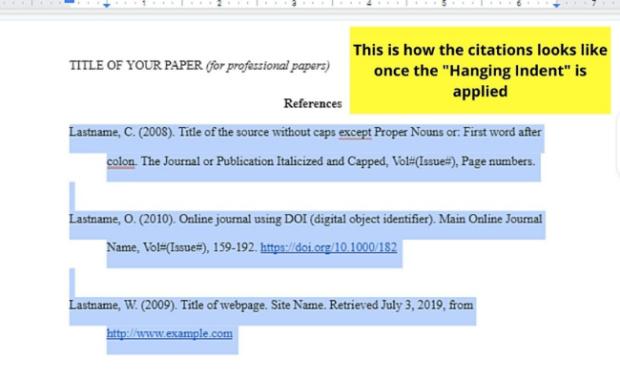
Most people who use hanging indents write scientific papers. That is why you should know how to apply them in your Google Docs. Here are the typical rules for APA (American Psychological Association):
- Apply a hanging indent of 0.5 inches.
- Put the section label “References” in bold at the top of the page (centered).
- Organize the references alphabetically.
- Double-space all text.
You may also like: Inkjet Vs. Laser Printers
If you study humanities or social science, you probably follow the MLA (Modern Language Association) reference style. Follow these rules when indenting:
- Use a hanging indent on entries that run over onto additional lines.
- Use left alignment and double line spacing (no extra space between entries).
- Alphabetize the entries by the author’s last name.
- Include a header with your last name and the page number in the top right corner.
- Title the page Works Cited, centered and in plain text (no italics, bold, or underline).
Conclusion
More students and academics use Google Docs for writing papers and journals. That is why you should learn to put hanging indents in your assignments.
Fortunately, you can follow the many ways I’ve discussed. Alternatively, you may send your paper to auto-citation websites. However, they usually risk your data privacy and security.
Do you want more handy tips for Google Docs and other programs? Follow Inquirer Tech for the latest trends in computer software, artificial intelligence, and more.
Frequently asked questions about hanging indents in Google Docs
What is a hanging indent?
A hanging indent puts a space before all paragraph lines except the first. It usually spans half an inch and starts at the border. Also, the indent helps you indicate which lines are continuations of an entry so that you can read lists easier. Also, hanging indents make your papers more organized and appealing to readers.
When do I need a hanging indent?
People typically need hanging indents when writing academic papers. Those documents require citation styles like MLA and APA to have indentations in their reference options. Consequently, many people want to know how to put hanging indents in word processing programs like Google Docs and Microsoft Word.
Is there a website that can organize my references?
You can find numerous websites that can organize your references. However, you should ensure that your chosen platform has proper privacy and security policies. Ensure it will not take your information or plant malware in your system. Use the steps above to safely format your document without spending money.
INQUIRER.net wants to hear from you! Take part in our reader survey and help us be better. Click on this image to answer.
Read Next
Subscribe to INQUIRER PLUS to get access to The Philippine Daily Inquirer & other 70+ titles, share up to 5 gadgets, listen to the news, download as early as 4am & share articles on social media. Call 896 6000.
For feedback, complaints, or inquiries, contact us.
For all the latest Technology News Click Here
For the latest news and updates, follow us on Google News.


